
Dorna 2S Quickstart
This is a quick instruction on how to set up your Dorna 2S robot and run a simple program. Make […]
This is a quick instruction on how to set up your Dorna 2 robot and run a simple program. Make sure to go over the whole user manual for more information.
Mount the robot arm securely on a flat, sturdy surface with 4 x M8 screws. If holes are not available on your surface to mount the robot, you can use at least two clamps (example) to secure the robot base on a table (this mounting method is only recommended for a small range of motions at low speed).
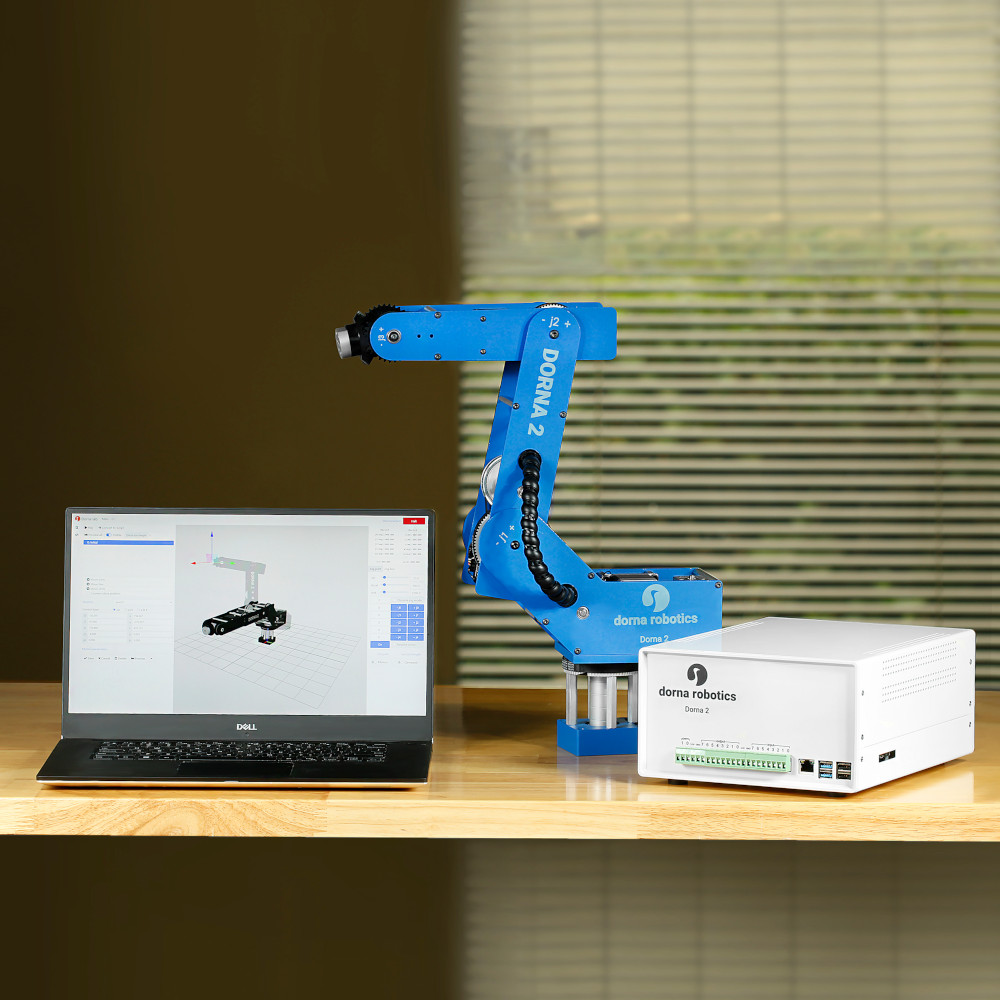
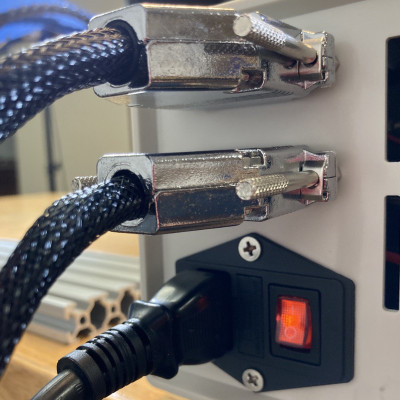
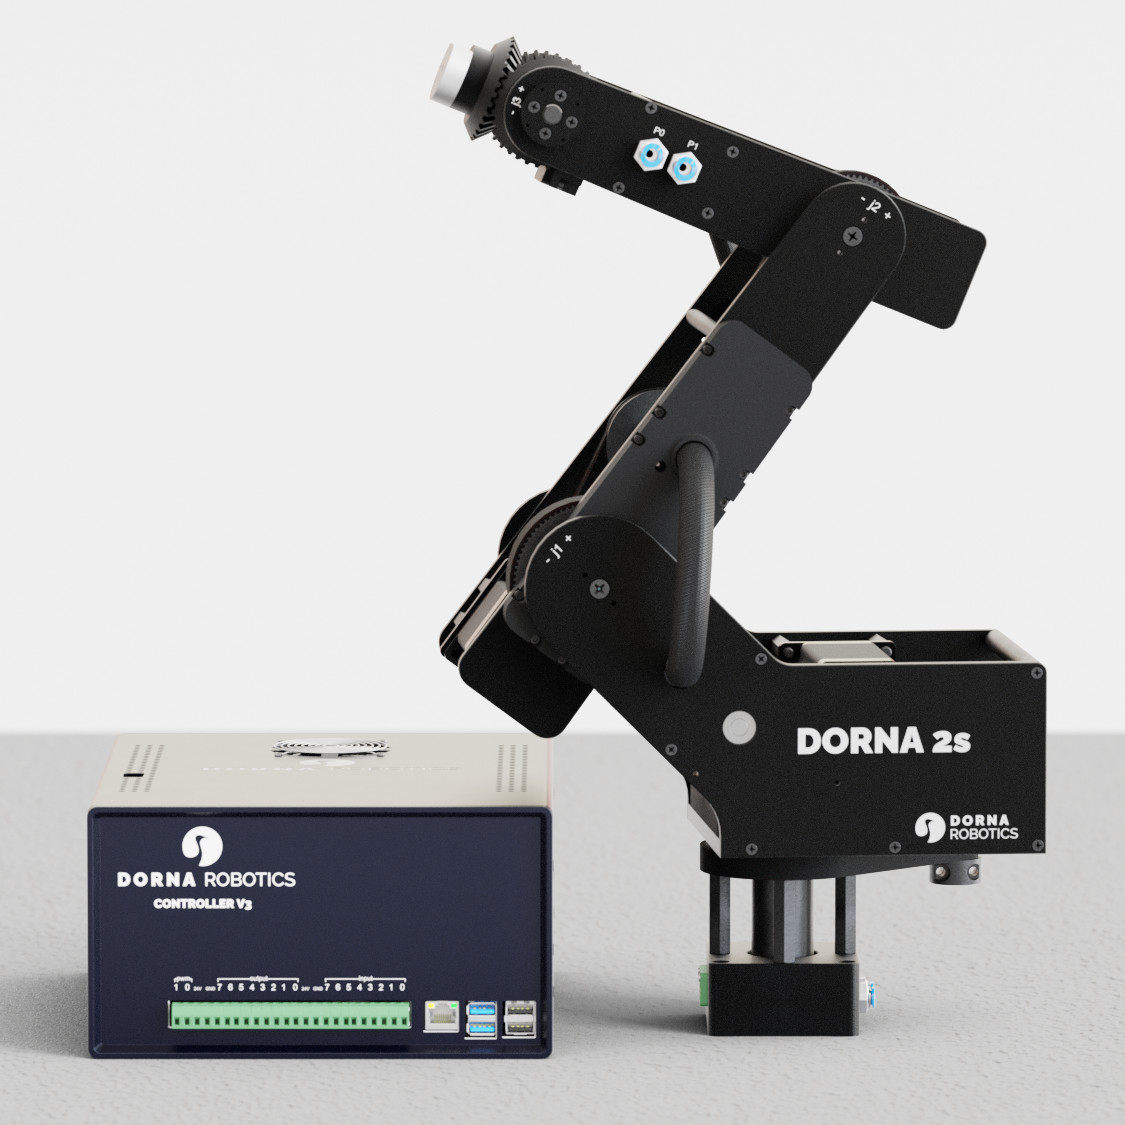
Make sure that the controller box is close enough to the robot, and you can attach the robot cables to it. Connect the two DB-25 cables from the robot base to the back of the robot controller. Ensure the connections are secure using the screws available on the DB shells.
Attach the robot controller to a router via an Ethernet port available on the robot controller. Make sure that your computer is also connected to the same router.
The robot is compatible with 115/230Vac. However, before turning on the robot controller, you must make sure that the right voltage is selected on the controller. Otherwise, it will damage the robot. The robot comes with a preselected voltage based on the customer region and is printed on a label attached to the controller box. Please verify the operating voltage and make any necessary adjustments before proceeding.
To adjust the operating voltage, open the top lid of the controller box by unscrewing the eight screws available on both sides of the top lid. The power supply is visible with a selectable red switch. Change the switch according to your need and close the lid.
Once you have selected the appropriate AC voltage, connect one end of the AC power cable to the back of the controller box, and connect the other to the AC plug.
Ensure your computer and the robot are connected to the same network (router). Open the Command Prompt (CMD) on your Windows or Terminal on your Unix OS computer and enter the following command to find the robot IP address.
ping dorna.local -4This will return the robot’s IP address. For simplicity of notation, assume that the robot’s IP address is 10.0.0.14 in this tutorial.
If this method doesn’t work on your computer, try other methods presented in the product user manual.
Dorna Lab (Dorna software) is the equivalent of the teach pendant’s interface of a traditional industrial robot. Open a Google Chrome on your computer and type in the Dorna Lab URL at
http://robot_ip_addressWhere the robot_ip_address is the IP address of the robot we found in the previous section (for example, if the IP address of the robot is 10.0.0.14 then the Dorna Lab address is http://10.0.0.14).
Dorna Lab interface is a web application that you can use to monitor, control, and program robots. No installation on your computer is required (except a browser) since all the necessary files are hosted in the robot’s controller.
Here we list some of the features of Dorna Lab, but you still need to go over the user manual for full documentation:
Each time you turn off the robot (or disconnect the robot cables), the encoders will no longer track the position of the robot axes. So, the first thing after turning on the robot is to tell the robot what the value of each joint is. The encoders will track the joint’s values until you turn off the controller again.
First, to set the joints to their correct values put the robot in a mechanically defined position. The position is called the home position and is defined as follows.
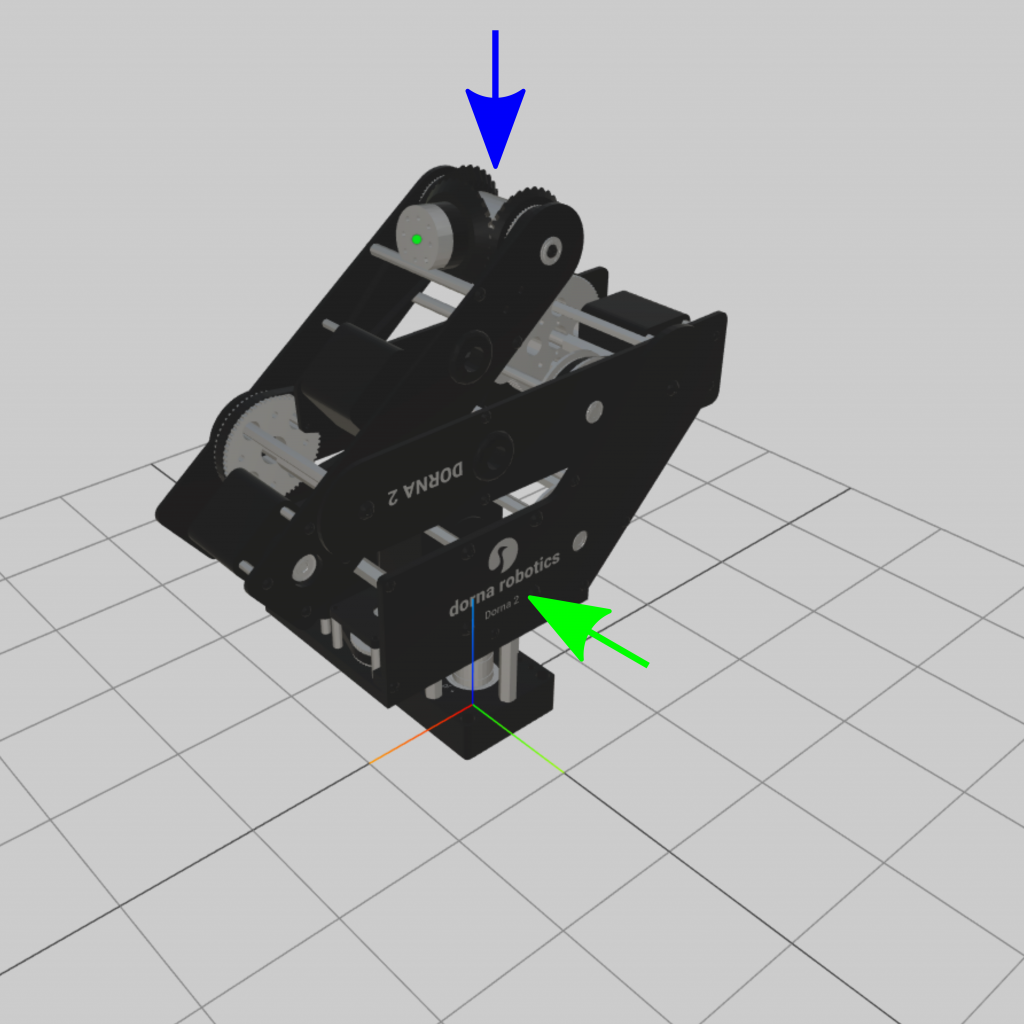
j0: Rotate j0 in its positive direction until it hits its hard stop.j1: Rotate j1 in its positive direction until it hits its hard stop.j2: Rotate j2 in its negative direction until it hits its hard stop.j3 and j4: Rotate j3 in its positive direction and position j4 until the flat part of the robot flange is fully touching the j3 hard stop.In Dorna Lab, navigate to the Set Joint section. The default value given in this window for each joint is the value of the joints at their home positions. We can either set each joint individually or use Set All to set them all together.
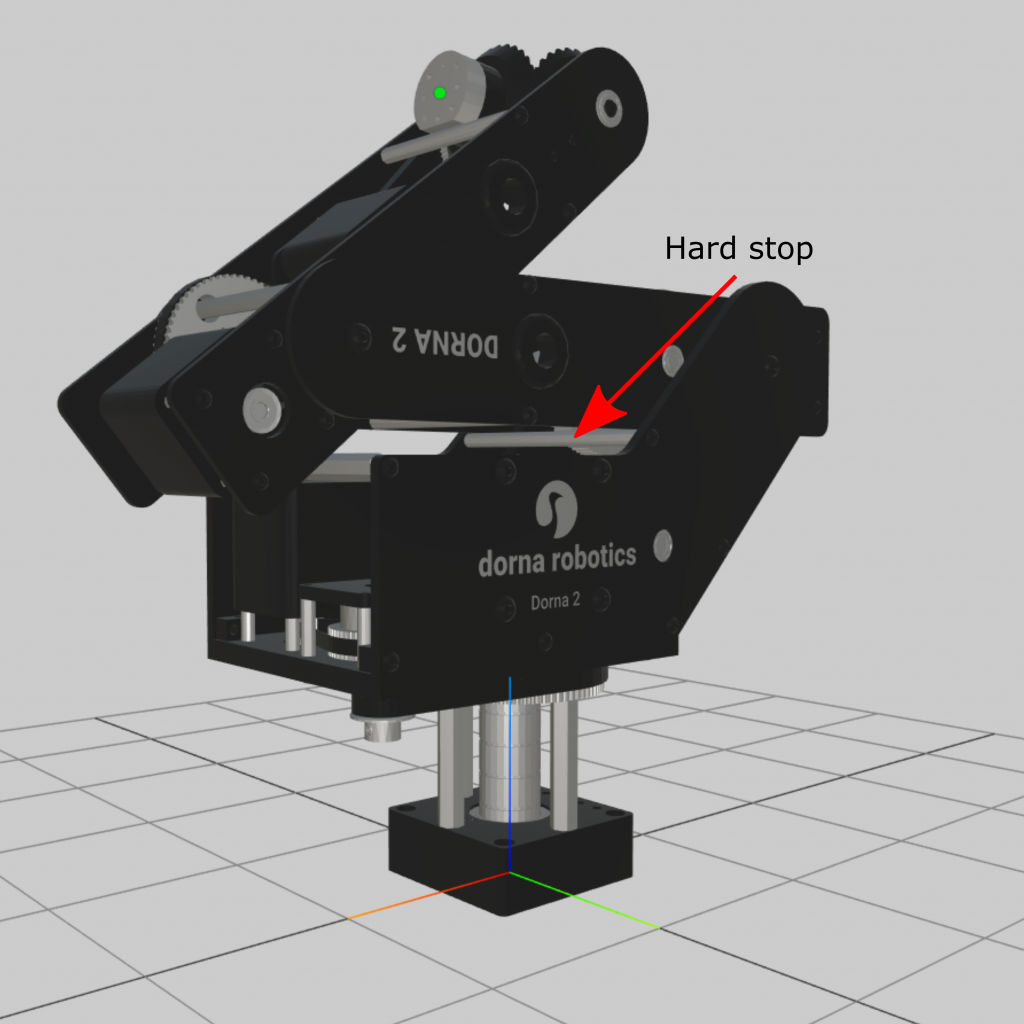
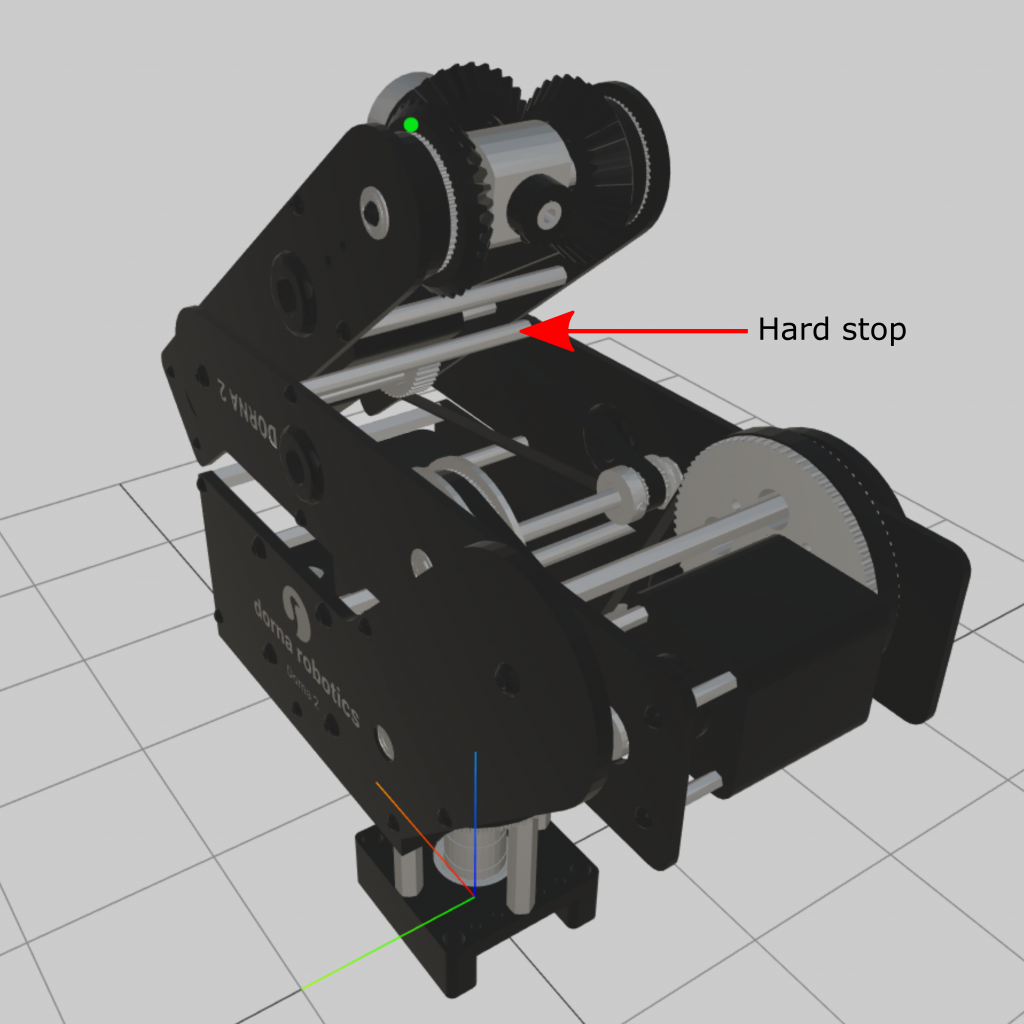
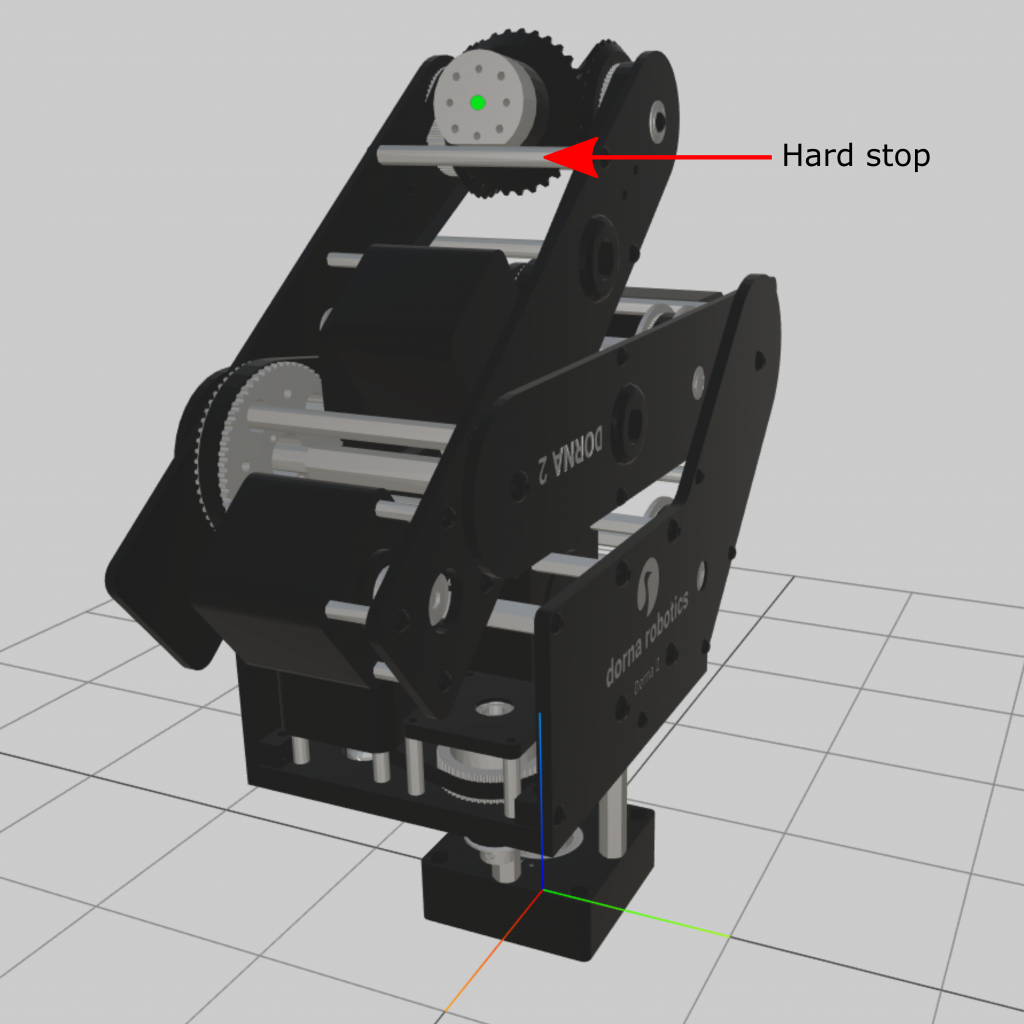
- For an accurate and consistent set joint process, ensure that you put steady and uniform force on the robot joints and that all the associated hard stops touch each other when running the set joint process.
- You can enter your custom joint values in the Set Joint section if you use a different home position or another reference position for your robot.
When turning the robot on, the motors are disabled by default, and you need to enable them (via Dorna Lab, command, or API) before running any motion command.
In Dorna Lab, navigate Main > Script.
Here, you can write simple commands and submit them to the robot.
{"cmd":"motor","motor":1}
{"cmd":"jmove","rel":0,"j0":0,"j1":0,"j2":0,"j3":0,"j4":0,"vel":50,"accel":500, "jerk"2000}
{"cmd":"lmove","rel":1,"x":-150,"vel":100,"accel":500,"jerk":2000,"cont":1, "corner":20}
{"cmd":"lmove","rel":1,"y":150}
{"cmd":"lmove","rel":1,"z":150}
{"cmd":"lmove","rel":1,"y":-300}
{"cmd":"lmove","rel":1,"z":-150}
{"cmd":"lmove","rel":1,"y":150}When turning off the robot, all the motors lose their power. So, it is important to put the robot in a safe orientation before turning off the robot. When ready, just switch off the power button on the controller to turn off the robot.
This is a quick instruction on how to set up your Dorna 2S robot and run a simple program. Make […]